Keeping your juicer clean doesn’t have to be a chore. These tips for cleaning your juicer easily will save you time and effort while keeping your machine in top shape. With the right cleaning routine, you can prevent buildup, stop odors, and keep every glass of juice tasting fresh and pure.
Tips For Cleaning Your Juicer Easily
Keeping your juicer clean will protect your health, preserve flavor, and extend the life of your machine. This guide gives you practical, step-by-step advice, useful tools, and quick tricks so you can clean efficiently and confidently every time you use your juicer.
Why cleaning your juicer matters
You might think rinsing is enough, but pulp and juice residue can cling to parts and harbor bacteria, yeast, or mold if not cleaned properly. Regular cleaning prevents odors, maintains juice quality, and avoids costly repairs or replacements. You’ll also get better yields and smoother juice when filters and blades stay sharp and unclogged.
Quick overview of juicer types and cleaning differences
Different juicer designs require slightly different cleaning approaches. Knowing which kind you have helps you pick the right method.
Centrifugal juicers (fast, many parts)
Centrifugal juicers use high-speed spinning to extract juice. They tend to produce more foam and fine pulp, and their mesh filters clog quickly. You’ll need to clean the filter and lid thoroughly after each use.
Masticating (slow) juicers
Masticating juicers use a slow auger to press produce. They make drier pulp and often have fewer removable parts, but the auger and screen still need careful cleaning to prevent residue buildup.
Twin-gear (triturating) juicers
Twin-gear models offer high extraction and many small crevices where pulp can hide. Cleaning usually takes longer, but these models benefit greatly from consistent, thorough maintenance.
Citrus juicers and manual presses
These are simple to clean because they have fewer parts and less fine mesh. Still, citrus oils and pulp can leave stains and odors, so you should wash and dry them promptly.
Tools and supplies you’ll want
Having the right tools makes cleaning faster and more effective. Most items are inexpensive and last a long time.
- Soft sponge or non-abrasive scrub pad
- Small nylon brush or dedicated juicer brush (for mesh filters)
- Toothbrush (for tight crevices)
- Bottle brush (for tall containers)
- Microfiber or lint-free towel for drying
- Rubber gloves (optional, protects hands and grip)
- Soft cloth or paper towels
- Mild dish soap
- White vinegar or citric acid (for descaling)
- Baking soda (for stains and odors)
- Lemon juice (for natural deodorizing)
Helpful accessories and where to use them
| Accessory | Best use |
|---|---|
| Mesh filter brush | Removing pulp trapped in the filter holes |
| Bottle brush | Cleaning juice jugs and tall containers |
| Toothbrush | Reaching small grooves in lids and seals |
| Silicone spatula | Scraping pulp without scratching parts |
| Microfiber towel | Speedy drying and preventing streaks |
Basic daily cleaning routine (what to do right after juicing)
Cleaning immediately after juicing is the fastest and easiest route. Once pulp dries, cleaning gets harder.
- Turn off and unplug the juicer. Safety first.
- Remove large pieces of pulp and dump them into a compost or garbage container.
- Rinse removable parts under warm running water to remove the majority of residue.
- If your juicer supports it, run water through the chute or filter for a few seconds to loosen trapped pulp.
- Use a soft brush and mild dish soap to clean the mesh filter, auger, and plastic parts.
- Wipe the motor base with a damp cloth — never submerge it.
- Dry parts with a towel or let them air dry on a drying rack before reassembly.
Every step should only take a few minutes if you act promptly.
Step-by-step deep cleaning (weekly or biweekly, depending on use)
If you juice daily or use fibrous vegetables, schedule a deeper cleaning at least once a week. This prevents buildup that simple rinses miss.
- Disassemble all removable parts completely.
- Soak the parts (except the motor base) in warm, soapy water for 10–20 minutes.
- Scrub the mesh filter with a dedicated brush in circular motions to clear trapped pulp.
- Use baking soda paste on stubborn stains or sticky residues; gently scrub with a sponge.
- For scale or mineral deposits, soak parts in a solution of 1 part white vinegar to 3 parts water for 10–15 minutes, then rinse thoroughly.
- Check gaskets and seals; clean and inspect for wear.
- Dry everything completely before reassembling.
Deep cleaning protects parts that are otherwise hard to reach and keeps flavor pure.
Cleaning the filter and mesh (most important part)
The filter or screen is the juicer component that most often requires attention. Blocked holes reduce yield and make the motor work harder. 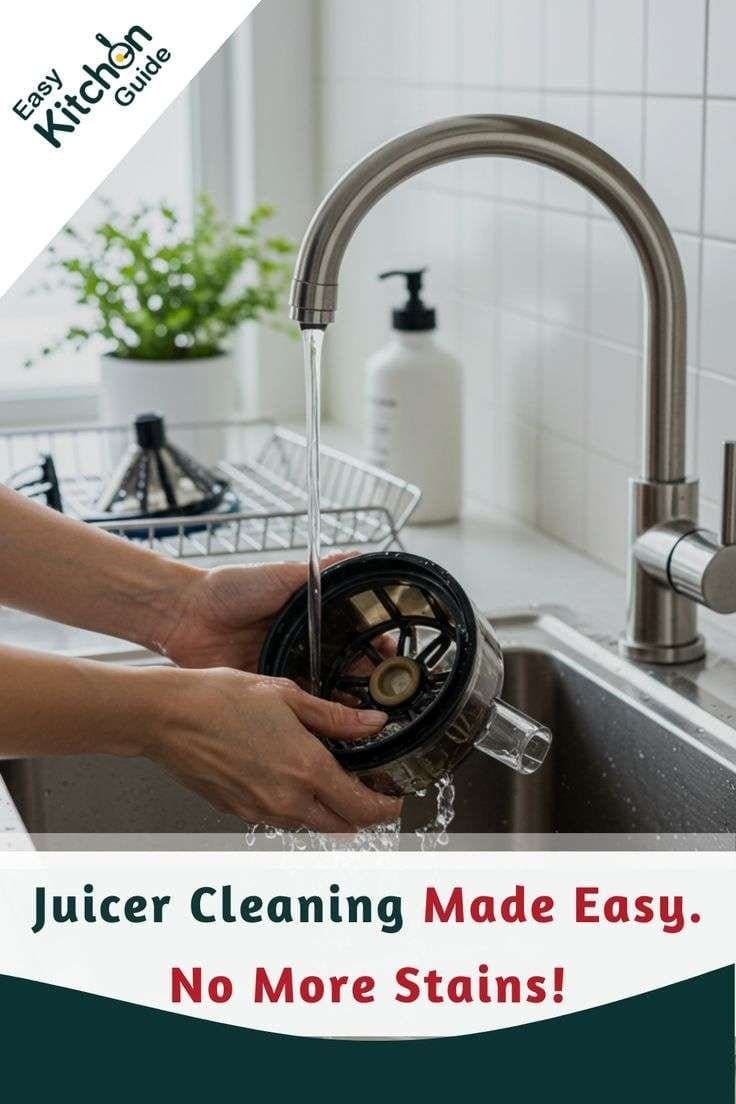
How to clean the mesh effectively
- Rinse immediately after juicing to prevent pulp from drying in the holes.
- Use a nylon brush to brush across the mesh surface, both sides if accessible.
- For persistent clogs, soak the filter in warm soapy water or a vinegar solution, then brush again.
- If available, use a specialized filter cleaning brush that fits the curvature and hole pattern.
- Avoid metal brushes and abrasive pads that can damage the fine mesh.
Mesh cleaning hacks
| Problem | Solution |
|---|---|
| Small pulp stuck deep in holes | Soak in warm water with a teaspoon of baking soda, then use the brush with firm circular motions |
| Fibrous threads | Use a toothbrush to tease out strands, then run water through the mesh from the opposite side |
| Persistent oils or stains | Apply lemon juice or a diluted vinegar soak for 10–15 minutes, then rinse |
Cleaning augers, blades, and other sharp parts safely
Sharp blades and metal parts need special care to avoid injury and damage.
- Use rubber gloves or a kitchen towel to protect your fingers while cleaning blades.
- Use a sponge and dish soap to clean blades, taking care to follow blade contours.
- For stainless steel components, wash with warm water and mild detergent. Avoid chlorine bleach as it can pit stainless steel and leave residues.
- Check for nicks and damage; replace blades when they become dull or bent.
Using the dishwasher: what’s safe and what to avoid
Many juicer manufacturers label certain parts as dishwasher-safe. Always check your manual first.
- Most plastic housings, pulp containers, and juice pitchers are top-rack safe.
- Mesh filters and fine screens are usually not recommended for dishwashing because dishwasher jets can warp or damage them.
- Wooden parts or rubber seals should never go in the dishwasher; heat can damage or deform them.
- If you use the dishwasher, place parts so they won’t get banged around. Use gentle cycles when available.
Descaling and removing mineral deposits
If you live in an area with hard water, mineral deposits can form on metal parts and inside chutes.
- Use a 1:3 solution of white vinegar to water or a citric acid solution to soak affected parts for 15–30 minutes.
- Rinse parts thoroughly after descaling to remove any vinegar smell.
- Run plain water through the machine afterwards to clear internal passages.
- Frequency depends on water hardness: monthly to every few months.
Descaling frequency guide
| Water hardness | Frequency |
|---|---|
| Soft | Every 3–6 months |
| Moderate | Every 1–2 months |
| Hard | Every 2–4 weeks |
Removing stains and odors
Fruit and vegetable pigments can stain plastic parts, and citrus oils can leave lingering smells.
- Baking soda paste (3 parts baking soda to 1 part water) acts as a mild abrasive and deodorizer. Apply, let sit 10 minutes, then rinse.
- Lemon juice or lemon halves rubbed over stained areas naturally bleaches and deodorizes.
- For persistent odors, soak parts in warm water with a few tablespoons of baking soda overnight.
- Avoid harsh chemical cleaners that can leave toxic residues on surfaces that touch food.
Quick-clean shortcuts for busy days
If you want a clean juicer fast, use these time-saving tricks.
- Immediately after juicing, pour warm water into the feed chute, reattach lid, and run the juicer for 10–20 seconds to flush pulp.
- Dump the pulp and give removable parts a quick rinse with soap and water.
- Use a brush quickly on the mesh filter and let parts air dry while you prepare the next day’s ingredients.
- Use paper towels to wipe up sticky spots from the motor base.
These quick steps prevent hardened residue and make later deep cleaning simpler.
Preventive habits that reduce cleaning time
Small habits can drastically reduce cleaning effort over time.
- Chop produce into smaller pieces to reduce force and pulp strings that tangles around blades.
- Alternate hard and soft produce when juicing to reduce fine foam and clogging.
- Use a screening accessory or pre-strain very fibrous items like celery or wheatgrass.
- Juice softer items first if your machine handles both; that reduces clogging with tough fibers later.
Safety and maintenance precautions
Keeping your juicer safe and in good condition prevents accidents and extends lifespan.
- Always unplug the unit before cleaning.
- Never submerge the motor base in water.
- Inspect seals, gaskets, and O-rings regularly and replace when cracked or stretched.
- Tighten screws and fittings per the manual to keep parts seated properly.
- Store the juicer disassembled if moisture trapped in parts could promote mold.
Troubleshooting common cleaning issues
If you run into problems despite regular cleaning, try these fixes.
- Strong, persistent odor: Soak removable parts in warm water and baking soda for several hours, then rinse and sun-dry.
- Filter won’t come clean: Soak in warm water and a tablespoon of vinegar, then use a stiff nylon brush.
- Sticky or gummy residue: Use lemon juice or a baking soda scrub; avoid steel wool that scratches.
- Mold in hard-to-reach spots: Disassemble fully and soak in a vinegar solution; replace any parts that remain discolored or smell after cleaning.
Eco-friendly disposal and pulp reuse
Instead of throwing pulp away, you can turn it into something useful.
- Compost: Most pulp is excellent for composting and helps reduce waste.
- Recipes: Use pulp in crackers, veggie burgers, muffins, or soups for fiber and flavor.
- Pet treats and garden mulch: Check that produce is safe for pets if you plan to use pulp in treats.
When to replace parts
Even with careful cleaning, parts wear out. Replace items when you see:
- Cracks or warping in plastic parts
- Torn or brittle gaskets and seals
- A filter that’s permanently clogged despite deep cleaning
- Motor sounds like it’s straining — have a technician inspect it
Replacing worn parts preserves performance and avoids contamination.
Cleaning schedule and checklist (quick reference)
Keep this simple schedule to stay on top of maintenance.
| Task | Daily | Weekly | Monthly |
|---|---|---|---|
| Rinse removable parts | ✔ | ||
| Wash with soap and water | ✔ | ||
| Clean filter/mesh thoroughly | ✔ | ✔ | |
| Descale parts (if needed) | ✔ or as needed | ||
| Inspect seals and gaskets | ✔ | ||
| Deep clean and soak parts | ✔ |
Natural cleaning recipes and safe cleaners
If you prefer natural cleaners, these are gentle and effective.
- Warm soapy water: The universal method for daily cleaning.
- Baking soda paste: Use for stains and mild abrasion.
- Vinegar soak (1:3 vinegar:water): Good for scale and odor removal.
- Lemon juice: Natural deodorizer and mild bleach.
Avoid strong bleach solutions on food-contact surfaces. If you must use stronger disinfectants because of contamination concerns, follow product guidance and rinse thoroughly.
Specialty tips for certain produce
Some fruits create unique cleaning challenges.
- Wheatgrass and fibrous greens: Rinse immediately and use a brush to remove strings from the auger.
- Beets: Their pigments stain plastic quickly. Clean promptly and use baking soda if stains appear.
- Citrus: Oils can linger. Wash with warm water and a little dish soap; rub with lemon or baking soda if needed.
What to avoid when cleaning
Certain mistakes can cause damage or health risks.
- Never put motor base in water or the dishwasher.
- Don’t use metal scouring pads on mesh filters or polished stainless parts.
- Avoid undiluted bleach on surfaces that contact food.
- Don’t force parts during disassembly; consult your manual if something is stuck.
Accessories that make cleaning simpler
Consider these items to reduce time and effort:
- Dedicated juicer brush set
- Extra juice pitcher and pulp container to rotate while one is drying
- Silicone spatula to scrape pulp without scratching
- Top-rack dishwasher basket for small parts (only if parts are dishwasher-safe)
Frequently asked questions
Q: Can I leave juicer parts to soak overnight? A: Yes, soaking can help loosen stubborn residue, but follow with vigorous rinsing to remove any residual soap, vinegar, or baking soda.
Q: How long should I let parts dry before reassembly? A: Ensure all parts are completely dry to the touch. Moisture trapped between parts can promote mold. A few hours of air-drying or towel drying works well.
Q: Will vinegar damage my juicer? A: When used diluted (1:3 vinegar to water) and rinsed well afterward, vinegar is safe for most removable parts. Don’t use vinegar on rubber parts too often, as it can degrade some materials over very long periods.
Q: Is it OK to use bleach? A: Mild diluted bleach can disinfect, but it’s risky on food-contact surfaces because residues may remain. Prefer vinegar, baking soda, and hot water for routine cleaning.
Q: My filter is tearing. Can I glue it? A: Don’t glue food-contact parts. Replace the filter with an authorized OEM replacement to maintain safety and performance.
Final checklist before you store your juicer
- All removable parts are cleaned and rinsed.
- Parts are totally dry before reassembly or storage.
- Motor base is wiped free of residue.
- Gaskets and seals are checked and placed correctly.
- You’ve stored the juicer in a dry, cool place away from direct sunlight.
Summary
You’ll save time and avoid problems by creating a simple, consistent cleaning routine. Rinse immediately after juicing, use the right brushes for your mesh filter, and perform weekly deep cleans. Descale and treat stains as needed, and replace worn parts to keep performance strong. With a few tools and a little practice, cleaning your juicer can become a quick and painless part of your routine rather than a chore.
If you stick to these tips, you’ll enjoy better-tasting juice, fewer odors, and a juicer that lasts for years.
Disclaimer.
This content is for informational and educational purposes only and is not intended as medical advice. Always consult a qualified healthcare professional before making changes to your diet, especially if you have a medical condition, are pregnant, or are taking medication.
As an Amazon Associate, we earn from qualifying purchases.